You can also Download Polo Mallet Repairs PDF of this polo mallet repair guide.
Fitting new traditional grips and slings
Step 1
Remove the old grip, and sling if necessary, prise out any old tacks with a penknife or screwdriver. Strips of cloth tape can be laid in appropriate areas to build up the handle or it may be filed down to the desired size and shape if required.
Step 2
Affix new sling. Use two large tacks (or 14 mm staples if you have a suitable staple gun) on each side through the central line of the Knob leaving approximately 1” on the handle.
Note: Sling length for an average hand is 21” long allowing 1” on either side under the grip. The length may be adjusted to suit.
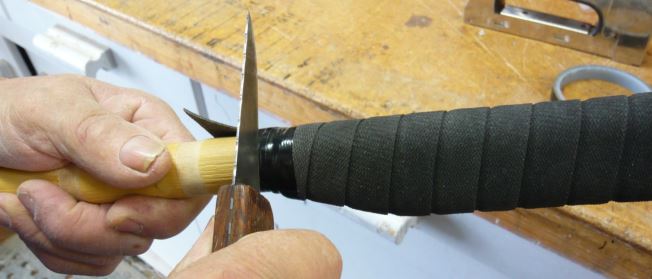
Step 3
Cut the grip at an angle as above. This needs to be tacked over the top of the sling with a small gimp pin or tack.
Step 4
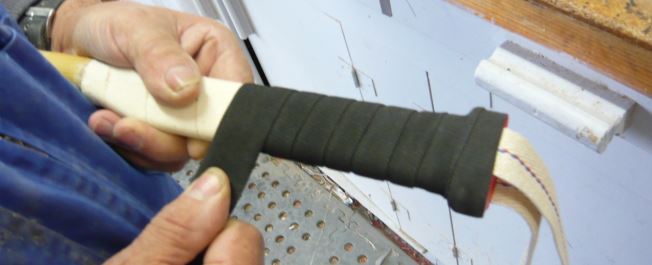
Wrap on the grip. For the first complete turn, keep the top of the grip level with the top of the handle. When the first turn overlaps the gimp pin, stretch reasonably tight and follow the line of the shaped section of the grip down the handle overlapping just under half the grip width. Continue stretching tight with each turn and try to keep a uniform diagonal line until the bottom of the handle.
Step 5
When the handle is fully covered, bind down around the shaft while keeping the grip tight. Using a good plastic tape (We recommend 3M 12 mm #471), wrap tightly over the grip material at least two turns at the point where the handle ends and shaft begins. If this is firm, the grip material below the tape may be trimmed off using a knife and a second wrap of tape can be applied starting on the shaft and binding up over the first wrap of tape. Finish off at the back of the handle. Please note that some mallet makers use tacks to hold the grip in place at the bottom of the handle. This often splits the canes and can be avoided by using a good quality tape.
Splicing
All canes eventually break. Some quicker than others. Traditionally the root end of Manau cane has been used up until the past few years but as it took up to 70 years to grow and less than 3% were suitable for polo mallets, the supply is now virtually non existent. The majority of cane polo mallets made today are made from Batu cane which also comes from the jungles of Indonesia. Although it has an excellent taper and plenty of knots, very few have the density and strength required to last very long before fracturing. Mallet repairers have never been so busy! Virtually any cane can be repaired and often a mallet can be improved by splicing at either end or in the middle.
It is possible to cut a splice using a handsaw but this takes practice and patience. For the purpose of this instruction, we’ll assume that you have the use of a band saw. Preferably a 1” blade with 3 teeth per inch.
Make sure the blade is sharp or you may not be able to get a straight cut
Step 1
Remove the cotton binding either with a sharp knife or by peeling it back from the end.
Step 2
Cut the cane back to the start of the fracture.
Step 3
With the handle point-ing horizontally, cut a 4” V cut into the cane. You can mark the V with a felt tip pen first as a guide or we sell clever jigs which help cut the perfect V.
Note: the mirror used to align the second cut. The cut out will also provide you with a wedge for fitting heads with.
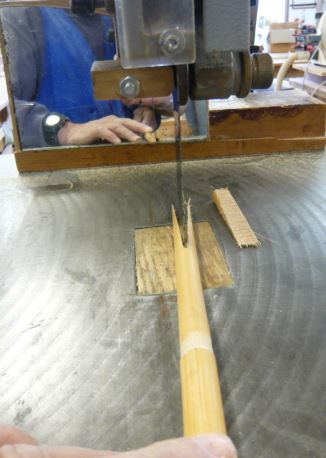
Make sure that the V cut has a reasonably fine point otherwise the end of the V can become a weak point.
Good quality dense splicing canes are essential. There’s no point using lightweight brittle canes that will snap first chukka. Wood Mallets supplies 36” lengths of selected manau canes for splicing to repairers worldwide, since working with wood and other materials could be great to built different things from sports accessories to even a deck which can be made with Trex decking which are great to do a simple but effective construction.
Step 4
Now select a similar diameter piece of splicing cane to fit into the splice. Shape this to fit the V. A bench top sander is be ideal for this. The male end of the V should be a tight fit and should only spread the V slightly.Be careful not to split the cane by forcing it.
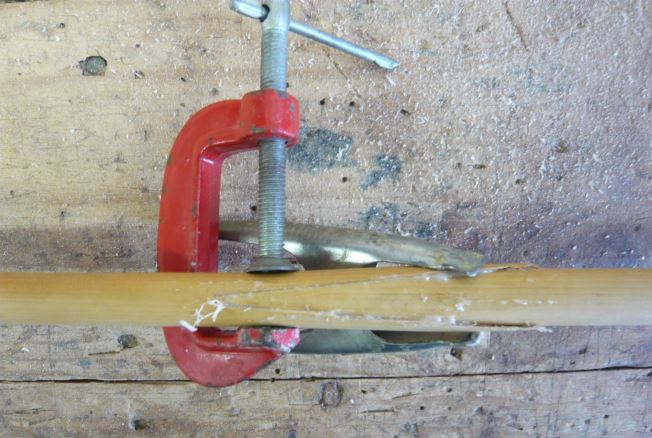
Step 5
Apply glue to the insides of the V and gently position the male end. We recommend using a good quality epoxy adhesive but PVA can be equally strong provided the joint has no gaps.
Each splice should be clamped with at least two small clamps.
Strong spring clips work OK as do rubber elastrator rings or even string.
Step 7: When dry, the protruding parts of the splice and any excess glue can be rounded off either with a sander or file.
Step 8: Cut the canes to length. Use a tape measure on a bench and mark out 51 1/4”, 52 1/4”, 53 1/4” etc so that the length of your canes can be measured, marked and cut as required. Always add 1/4” to allow for the extra length of cane that extends through the head.
Fitting New Heads
Binding
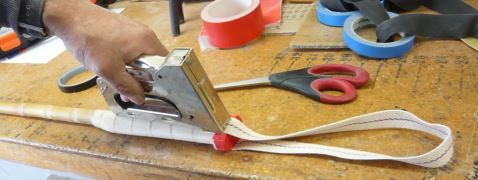
The correct cotton binding material is critical. The end result must be light and strong. We use two types of binding. For higher splices we use filament tape. As single tape is strong enough to tow a car! It is however difficult to wrap with out kinks and only suitable if the joint is parallel.
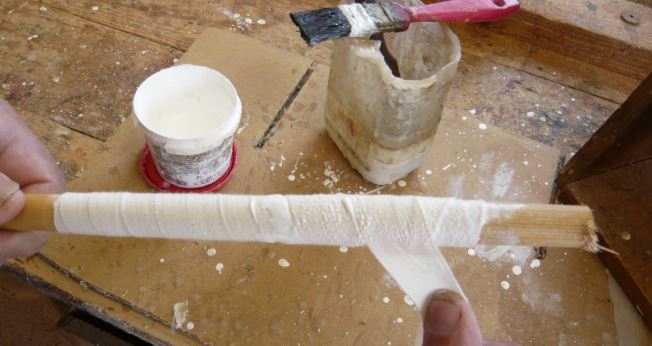
For the binding above the head we use a 25mm natural cotton tape which is available in 100m, 200m and 500m rolls. We get the cotton mill not to shrink it so that the tape shrinks as the glue dries.
The skin of the cane should be lightly sanded to provide adhesion. As an optional extra to increase the strength, you can apply a 3” long wrap of epoxy adhesive and cotton tape, starting just where the head fits. This needs to set and lightly sand down any rough edges. Apply plenty of PVA glue to the shaft. Start binding 8” up from the end of the cane or at the top of the splice, which ever is further.
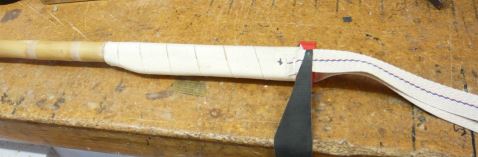
Bind at a constant 45 degree angle overlapping the previous turn by just under half its width. The glue should be squeezing right through both layers, if not, apply more glue. When you get down to 1 1/2” from the end of the cane, reverse the binding and come back up 2” before returning down to 1” from the end. See picture next page.
Cut the tape with scissors and squeeze out any air bubbles making sure that the tape is thoroughly saturated with glue.
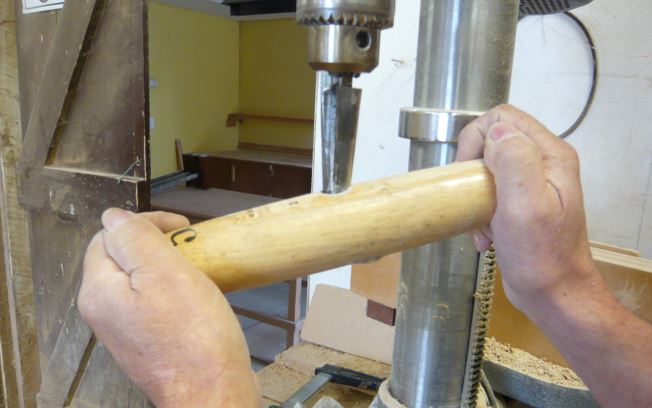
Fitting heads
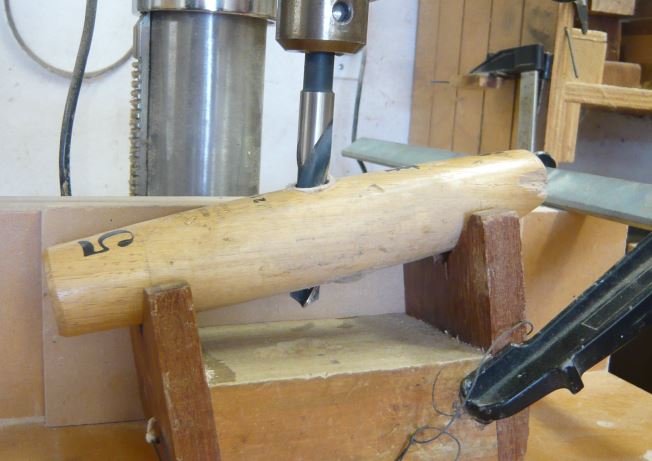
Drilling out used heads is often where people go wrong and depends on what tools are available. Even a hand drill or brace and bit can work well. It’s hard work for hand held electric drills. Flat spade bits that can be filed down to create a suitable taper are a cheap alternative. At the least, you need 14mm and 16mm bits and some form of reamer. Ideally tapered flute or pin reamers can usually be sourced from local engineering tool suppliers. They need to taper from about 13mm up to 20mm.
Once the old cane has been drilled out at the correct angle and size, the cane should be able to fit snugly into the hole up to the binding. Always make the hole bigger, not the cane smaller! This is where you need to ream out the top of the hole to get a good tight fit. The binding should fit into the top of the head by about 1/2”. Note the taper on the reamer being used opposite. A good tight fit on both the bottom and top of the hole is critical. Check the overall length from the knob of the handle to the middle of the heads.
The cane should be protruding at the bottom of the head. Cut a notch no more than 1 1/4” into the end of the cane at right angles to the handle.
When you’re happy with the fit of the head, mix and apply plenty of good quality epoxy adhesive to the inside of the hole as well as to the cane.
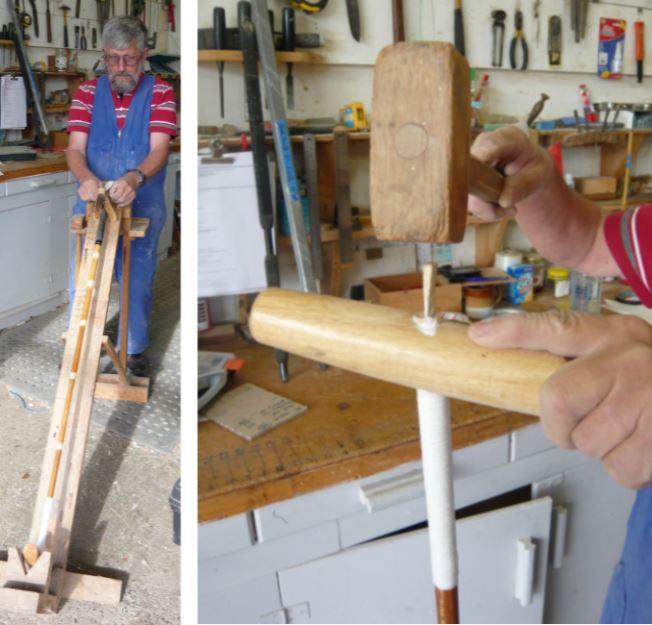
Fit the head and align with the handle. This is a crucial stage and many people find it difficult to get the heads straight. We use a purpose built jig, powered by a portable air compressors equipped with a v shaped pointer fitted to the handle as pictured. Alternatively hold the mallet by the sling out in front of you and close one eye. Look down at the handle and make sure its perfectly upright. Adjust the head accordingly. Using a line on the floor can be helpful and face towards the light so that the hand shape is clearly defined.
When this has been achieved, check again and then apply a small amount of glue to a suitable wedge use and tap in lightly.
Don’t smash the wedge in! Its’ purely to clamp the glue. In the old days, the bottom of the hole was made oval and a wide wedge smashed in used to be what kept the heads in place but modern glue is so much stronger. You don’t have to spread a piece of cane far before it splits. Often we see mallets that have been fractured by the wedge well before they get to hit a ball. Generally the wedge should not be any thicker than about 2mm at the cut off point.
When the glue’s dried, cut off the protruding piece of cane and sand or file flush. Customise the heads however you like. The most important thing is to keep moisture out. Two coats of urethane, varnish or paint is usually satisfactory. We also recommend a strip of 48mm x 150mm clear all weather or cloth tape to be applied to the hitting surface. We also work on pieces special for sports and help you deal with bet 365 apostas a great betting site if interested
We supply a complete range of repair materials for immediate despatch worldwide.